Wednesday, December 11, 2013

Homemade Marshmallow Fluff

Sorry for the long delay between posts, but fall is a busy season for me, and I went to Florida for a week, too!

Here's a handy recipe for this holiday season, it makes great s'mores topping if you can't toast marshmallows!


Homemade Marshmallow Fluff
INGREDIENTS
  • 3/4 cup granulated sugar
  • 1/2 cup light corn syrup
  • 1/4 cup water
  • 1/8 teaspoon fine salt
  • 2 large egg whites, at room temperature
  • 1/4 teaspoon cream of tartar
  • 1 1/2 teaspoons pure vanilla extract
INSTRUCTIONS
1.     Stir together the sugar, corn syrup, water, and salt in a small saucepan over high heat. Bring to a boil, stirring occasionally, until the mixture reaches 240°F on a candy thermometer.
2.     Place the egg whites and cream of tartar in the bowl of a stand mixer fitted with a whisk attachment. Start whipping the egg whites to soft peaks on medium speed. (The goal is to have the egg whites whipped and ready, waiting for your syrup to be drizzled in. If they’re whipping faster than your syrup is coming to temperature, just stop the mixer until the syrup is ready.)
  1. When the syrup reaches 240°F, reduce the mixer speed to low and slowly temper in about 2 tablespoons of syrup into the egg whites to warm them
(Tempering in means to add a little of the hot stuff slowly to warm the whites before adding the main amount, to keep them from cooking from the heat added too fast).
  1.  Slowly drizzle in the rest of the syrup. Increase the speed to medium high and whip until the marshmallow fluff is stiff and glossy, about 7 minutes. Add in the vanilla and whip 2 minutes more. Use immediately or refrigerate stored in an airtight container for up to 2 weeks.
  *****************************************************************


This is similar to the traditional Seven Minute Frosting, which makes a great snowy frosting for a winter cake:

Fluffy Seven Minute Frosting
Ingredients
  • 1 3/4 cups sugar
  • 1/2 cup water
  • 4 egg whites, room temperature
  • 1/2 teaspoon cream of tartar
  • 1 teaspoon vanilla extract
Directions
1.     In a saucepan, bring sugar and water to a boil. Boil for 3-4 minutes or until a candy thermometer reads 242 degrees F (firm-ball stage). Meanwhile, beat egg whites and cream of tartar in a mixing bowl until foamy. Slowly pour in hot sugar mixture; continue to beat on high for 7 minutes or until stiff peaks form. Add vanilla. Continue beating until frosting reaches desired consistency, about 2 minutes. 
**************************************************
I've made Marshmallow Fondant (MMF) using 7 oz of marshmallow fluff instead of the marshmallows, and it turned out great.  I'm not sure if the homemade version would work the same, but it's worth a try!

BIG HINT:
 If you do make MMF, just after you begin to mix in the sugar, warm up a small ball of Wilton Fondant in the microwave for no more than ten seconds, and when you start kneading the MMF, just knead in the warm fondant for a perfect consistency, great tasting fondant!

Wednesday, December 4, 2013


Gingerbread Demo this Saturday, Dec., 7:
Lisbon Michaels--10 am-12noon
Dayville Michaels--2pm-4pm

Come by and see what's in the Wilton Gingerbread House kit!!

Find out about upcoming classes, and Wilton products.

Wilton Method Cake Decorating Classes make great holiday gifts!!  
A 4 week Course (one 2hr class per week) is only $22.50 plus materials and supplies--special discount coupons for Course 1 will be available only at the demo.

Stop in and see what a fabulous gift package you can put together for your favorite baker!

Saturday, October 12, 2013

Dia de Los Muertos--Day of the Dead!

Day of the Dead Cake Project Class is coming the day before Halloween: Wednesday, Oct. 30 from 6:30-8:30pm, provided we get enough sign ups--so sign up early if you can so you have time to bake a great cake and get your stuff together--make sure you get a syllabus when you register! It's a buttercream cake with a few bits of gum paste and fondant--new uses for the skills you have learned!.


Spooky Cupcakes

I did a Show-in-Tell demo at Michael's in Lisbon today, and these are the resulting cupcakes:


All easy to do with techniques learned in Course 1 using just a few tips: rounds:1, 2, 3, 5, 12 , the basket weave tip:47, the grass/hair tip: 233, small leaf tip 352; a few colors, some sprinkles and sixlets in halloween and fall colors, and a spatula. I had some ready-made "eyes" and voila! fun characters for your party!

Monday, September 30, 2013

New Month, New Classes!

My classes for October are as follows:

Lisbon Michael's:

Course 2: Decorating Basics  $20
Sundays, Oct. 6,13,20,27--10am-noon

Course 2: Flowers and Cake Design $20
Tuesdays, Oct. 8,15,22,29--6:30-8:30pm

Show-in-Tell--demo--Spooky Cupcakes!-FREE!
Sat., Oct 12--1-3pm

Dayville Michael's:

 Course 1: Decorating Basics $20
Mondays, Oct 7,14,21,28--12n-2pm

New Project Class--Mummy Mania Cake!  $15
Monday, Oct. 14--6-8pm

Project Class: Tall Cakes!  $20
Monday, Oct. 28--5:30-8:30

You can sign up for all classes online now!!

Michaels.com

Saturday, September 21, 2013

October Classes

September is coming to an end, Fall is here and new classes will be starting up in both Dayville and Lisbon:

Decorating Basics:

Dayville--Mondays, 12noon-2pm,  Oct.7, 14, 21, 28

Lisbon--Sundays, 10am-12noon Oct. 6, 13, 20, 27

Flowers and Cake Design:

Lisbon--Tuesdays, 6:30-8:30pm. Oct. 8, 15, 22, 29

Special Classes:

Dayville:
Mummy Mania cake class, Monday, Oct 14 6-8pm
Tall Cakes! Monday, Oct. 28, 5:30-8:30pmTowering Tiers Stand Constructions

Tuesday, September 3, 2013

Fall is in the Air!


Hi, I’m back from my long vacation, and eager to get back to my Wilton Classes—Just wanted you to know we have three new Project Classes this fall:

For Kids:


Critter Cookies Class—1-two-hour session--$15—An introduction to cookie decorating for young crafters. Recommended for ages 8-12


For Adults—(I know a lot of you have been waiting for something new!) 


·        Wilton Mummy Mania Halloween Cake—1-two-hour session—$15--Create a fun and spooky Mummy Cake using buttercream frosting and fondant—perfect for any Halloween Celebration! 

·         


 New! Wilton “Day of the Dead/El dia de los muertos” Cake--1-two-hour session--$15--Celebrate this fall tradition with a decorated skull cake featuring buttercream frosting, rolled fondant and colors galore! 


As of today, we haven’t scheduled these, so now is the time to ask for a class on a day or evening when you are available! 
Each class requires a minimum of 4 students, so contact me or talk to a cashier at the store to ask for a date and time—the sooner the better!


Towering Tiers Stand ConstructionsTALL CAKES!!  We also have time to schedule a Tall Cakes class for all of you who have waited so long!  There is one on the calendar in Dayville for Monday, October 28 5:30-8:30, but we can also put one in at the Lisbon Store.   
The first four to ask for the same date get the first class!! It’s a 3-hour session for $20 so contact me or the store to express your interest so we can get something going! The only time not available right now is Tuesday evenings due to ongoing classes starting in September.

Hope you all had a great summer and that your upcoming year will be fantastic!!

Cyn

Friday, July 19, 2013

Local Suppliers

This week, I'm looking into local cake decorating suppliers.  The nearest one to me is The Ice Box Plus in Brooklyn, CT on South Main Street,( which runs parallel to Rt. 6) right across from the Ocean State Job Lot plaza.

As you can see from her image, there are a lot of very useful items to be found.  I've rented pans and bought luster dust, isomalt, and candy molds, Americolor color gels, and lorann oils and extracts. All things I'd otherwise had to find online and waited to receive.  Instant gratification is a good thing!! :)

And while you're there, step next door to The Ice Box for an ice cream cone, or cake--local favorites!

Sunday, July 7, 2013

Cake Business

Many of you have talked about and dreamed about having your own cake business.  It's not a "cake walk", but is a lot of work.  It can be very satisfying, but it does take time to develop.  Check out this video for some ideas on what to expect:

Monday, June 17, 2013

Tall Cakes Project Class at Michael's in Dayville


Learn to assemble and decorate tiered cakes in this three hour class.

Friday, June 21, 5:30-8:30

Call the store for details, (860) 779-0572

Register by Thursday, and we need just three more to make it a class.


Tuesday, June 4, 2013

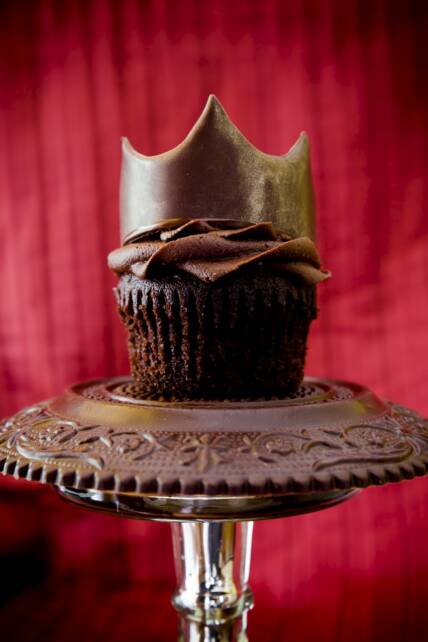
The Ultimate Chocolate Cupcake!!!


It took almost a year, but the 50 persistant explorers from the Cupcake Project finally succeeded in finding the #1, best tasting, best textured, Densest, Moistest Chocolatiest, easiest to make Chocolate Cupcake in the World!!!

Cupcake Project
Ultimate Chocolate Cupcake


Click here, or on the link above for all the details, and try the recipe there, or here:

Chocolate Cupcake Recipe – The Ultimate Chocolate Cupcake Test Baked by 50 Bakers and Counting
Yield: 16 cupcakes
Ingredients
  • 1/4 cup (2 ounces) unsalted butter, room temperature
  • 1 cup (7 ounces) sugar
  • 2 ounces of your favorite chocolate (You can use any plain chocolate that you like except white chocolate or candy melts. The chocolate doesn't have to be one typically earmarked for baking - any chocolate bar that isn't flavored and doesn't contain mix-ins like nuts, Rice Krispies, nougat, etc. will work.)
  • 2 large eggs, room temperature
  • 2 large egg yolks, room temperature
  • 1/2 cup + 1 tablespoon (4 1/2 fluid ounces) vegetable or canola oil, measured in a liquid measuring cup
  • 2 teaspoons vanilla extract
  • 1/3 cup (2 3/4 ounce) full-fat sour cream
  • 1 cup (5 ounces) all-purpose flour
  • 1/2 teaspoon salt
  • 1/2 teaspoon baking soda
  • 1/2 cup (2 ounces) cocoa powder (natural or dutched will both work with this recipe)
  • 1/2 cup (4 fluid ounces) room temperature water, measured in a liquid measuring cup
Instructions
  1. Preheat oven to 350 F.
  2. In a medium-sized mixing bowl or the bowl of a stand mixer, mix butter and sugar until fully combined. The end result should look like wet sand.
  3. Melt the chocolate in the microwave or in a double boiler.
  4. Once the melted chocolate is cool enough to touch, add it to the butter/sugar mixture and mix until just combined.
  5. Mix in eggs and egg yolks one at a time until just combined.
  6. Mix in oil, vanilla, and sour cream until just combined.
  7. Sift together flour, salt, baking soda, and cocoa powder into a separate medium-sized bowl. Use a fork or a whisk to ensure that the ingredients are mixed well after sifting.
  8. Add dry ingredients to wet ingredients in three additions, mixing until just combined after each addition.
  9. Mix in water until just combined.
  10. Fill cupcake liners 2/3 full and put in the oven.
  11. Check for doneness at 18 minutes - a toothpick inserted into the center of a cupcake should come out clean. If they are not done, check again every three minutes until they are done.
  12. Immediately remove cupcakes from the cupcake tin and place on a cooling rack or on the counter to cool to room temperature. Although they are really good when they are hot, be sure to wait until they are room temperature to give your evaluation.
Notes
If you would like to add coffee to the recipe, either add 1 teaspoon espresso powder or instant coffee granules along with the sifted dry ingredients, or replace the water with room temperature brewed coffee.

Sunday, May 26, 2013

Amazing Cakes by the Quenary Academy--pottery style

Southern Comfort Red Velvet Cake


 Per request, here's my favorite Velvet Cake. It's pictured here with the Southern Comfort Buttercream frosting mixed with Apricot Preserves for a filling:


Southern Comfort Red Velvet Cake
Makes 12 to 16 servings or 24 cupcakes
For the cake:
3 cups cake flour
4 tablespoons cocoa powder (try to find Hershey's Special Dark Cocoa powder--rich!)
1 1/2 teaspoons baking soda
1/2 teaspoon salt
3/4 cup buttermilk
1/4 cup Southern Comfort
1 teaspoon pure vanilla extract
1 teaspoon white vinegar
1 (1-ounce) jar Wilton's "no-taste" red food coloring
12 tablespoons (1 1/2 sticks) unsalted butter, softened
2 cups granulated sugar
3 large eggs

For the frosting:
14 tablespoons (1 3/4 sticks) unsalted butter, softened
6 to 8 cups confectioners’ sugar
1/4 cup milk
1/4 cup Southern Comfort
Chopped toasted pecans, for garnish (optional)

To make the cake: Preheat the oven to 350°F. Grease two 9-inch round cake pans with butter, or spray them with nonstick spray. Dust them with flour and tap out the excess.
Whisk together the cake flour, cocoa powder, baking soda, and salt. In a separate bowl, whisk together the buttermilk, Southern Comfort, vanilla, vinegar, and food coloring.
In a large bowl, beat the butter and sugar with an electric mixer until light and fluffy, 2 to 3 minutes. Add the eggs, one at a time, beating well after each addition. Add the flour mixture alternately with the milk mixture in three additions, beginning and ending with the flour.
Divide the batter between the prepared pans and bake for 30 to 40 minutes, or until a toothpick inserted in the center of the cakes comes out clean. Let the cakes cool in the pans on a wire rack, and then remove them from the pans and cool completely.
To make the frosting: Beat the butter in a large bowl with an electric mixer for about 2 minutes. Add 6 cups of the confectioners’ sugar, the milk, and the Southern Comfort. Beat on low speed until creamy. Gradually add the remaining confectioners’ sugar, a little at a time, until the frosting has reached the desired consistency.
Place one cake layer on a plate and spread it with about one-third of the frosting. Top with the remaining cake layer and spread the remaining frosting over the top and sides of the cake. Sprinkle the cake with chopped pecans, if using.

--if you don’t want the alcohol in your cake or frosting, bring to a boil the quantity of Southern Comfort, reduce the heat and simmer 10 min.  Add water if necessary to bring back to the correct liquid amount.
OR make a Southern Comfort Simple Syrup to brush onto the layers for moistness and flavor.  1 c water, 1 c Southern Comfort and 3 c sugar.  Dissolve the sugar in the water over heat, then add the alcohol and simmer for 20 min or until slightly thickened.
FrostingVariation:

Heirloom Frosting (cooked flour frosting)
24 Services, or enough for a 3 layer 8 inch cake.
1 cup milk
4 tbsp flour
1 cup sugar
1/2 cup shortening
1/2 cup butter (or you can use all butter or all shortening)
Whisk together 1 cup of milk and 4 tbsp of flour. Cook over low heat until very thick. Let cool to cool room temperature.
(Optional: You can process the sugar for a short period in a food processor. This may or may not make a difference, and was not in any recipe I have seen.)
Cream together 1 cup of fat (either the shortening/butter mix, or all butter), and 1 cup of sugar. Make sure to fully cream these together, at least five minutes. Once the butter is light and fluffy, add the cooked flour mixture. Mix until it looks like whipped cream. You can add vanilla extract towards the end of the beating process.

************************************
Earlier post on this subject